
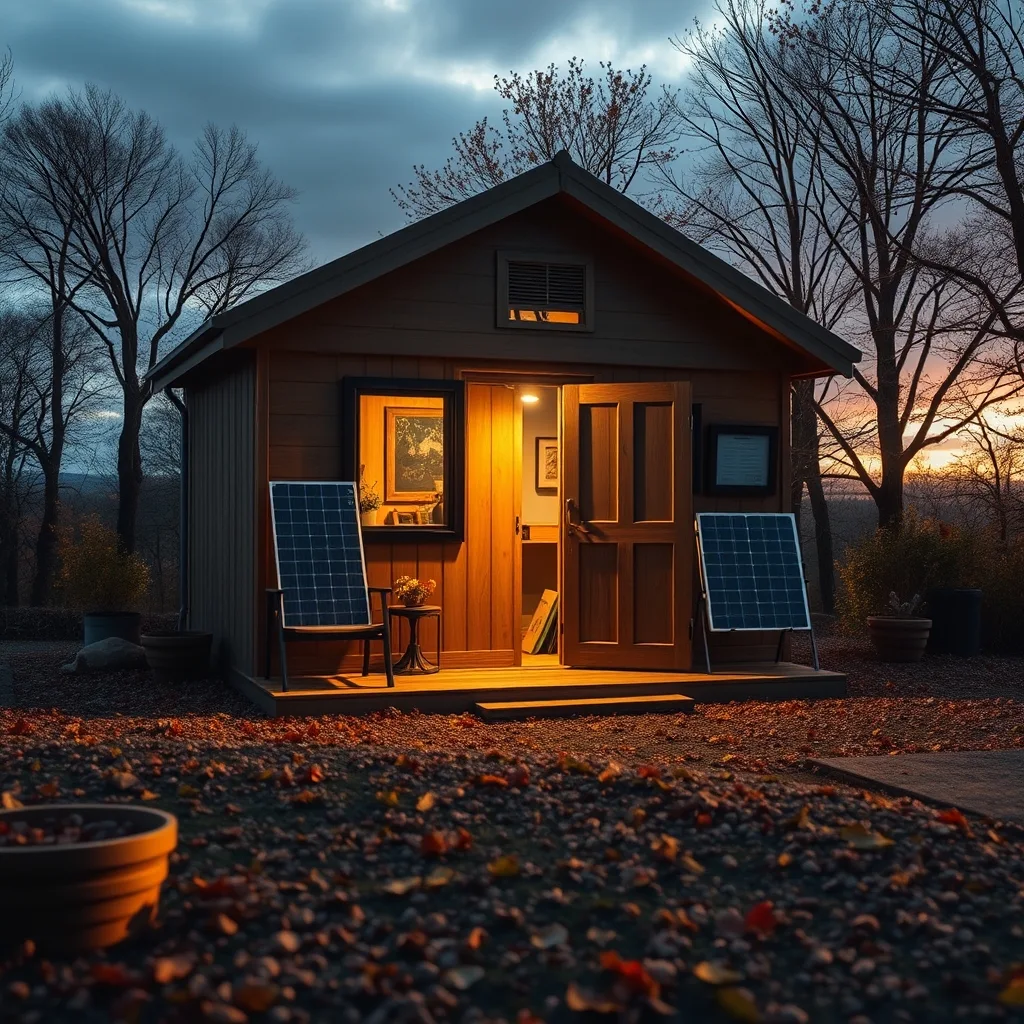
How to Upgrade Your Shed This Autumn With an Off-Grid Solar Power Station
As the golden hues of late summer shift into crisp autumn breezes, our relationship with our backyards begins to change. The patio furniture gets stored away, the lawnmower takes a well-deserved rest, and the trusty backyard shed often becomes a shadowy, unvisited storage unit for the next few months. But what if this autumn could be different? What if your shed transformed from a chilly, dark dumping ground into a cozy year-round workshop, a creative studio, or a peaceful autumn retreat?
Here at TechRook, we love a good weekend project that blends technology with practicality. Adding electricity to an outbuilding traditionally meant trenching hundreds of feet of heavy cable across your lawn and paying an electrician a small fortune. Today, there is a much smarter, cleaner, and more satisfying way to do it yourself. By building or installing an off-grid solar power station, you can bring reliable electricity to your shed without ever tapping into your home’s main breaker box.
In this comprehensive guide, we will walk you through everything you need to know to give your shed an ultimate autumn DIY upgrade using solar energy. From powering overhead lights for long winter nights to running low-wattage heaters and keeping your tool batteries charged, let's unlock your shed's true potential.
Why Autumn is the Prime Time for a Shed Solar Upgrade
Many people assume that solar power is strictly a summer hobby. After all, peak sunlight hours are longer in June and July. However, autumn actually presents the ideal conditions for setting up and utilizing a shed solar power station for several key reasons:
- Pleasant Working Weather: Installing solar panels, routing cables, and organizing your shed is much more comfortable in crisp 60-degree autumn weather than in the sweltering heat of mid-summer.
- Immediate Need for Lighting: As daylight savings ends and evenings draw in rapidly, the need for functional indoor and outdoor shed lighting spikes immediately.
- Mild Load Demands: Unlike summer (which might require heavy air conditioning) or deep winter (which demands heavy-duty freeze protection), autumn offers a balanced climate where a modest solar generator can easily handle moderate loads like LED lights, radios, and battery chargers.
- Protecting Sensitive Gear: Autumn brings dampness, morning frosts, and heavy rain. Keeping power tools and gardening equipment warm and dry prevents battery degradation and rust.
Understanding the Basics of an Off-Grid Solar Station
Before you start buying gear, let's demystify how an off-grid solar setup works. You do not need an engineering degree to set this up. Modern portable power stations have revolutionized DIY renewable energy by bundling complex electronics into a single, user-friendly box.
A complete off-grid shed solar kit consists of three main components:
- Solar Panels: These absorb sunlight and convert it into DC (direct current) electricity. For a shed, you can use rigid roof-mounted panels or portable folding panels that you angle toward the sun.
- The Solar Generator / Power Station: This acts as the heart of your system. It contains a charge controller (which regulates the power coming from the panels), a battery (which stores the energy), and an inverter (which converts DC power into standard AC household electricity for your plugs).
- Appliances and Loads: Whatever you plug into the system—such as LED strips, work lights, smartphone chargers, or heaters.
Choosing the Right Equipment for Your Shed
Selecting the right gear depends entirely on what you plan to do in your shed. Are you just turning on a light bulb for five minutes, or are you planning to run power tools and space heaters for hours? Let's break down your power needs.
1. Assessing Your Power Budget
To determine what size power station you need, make a quick list of the items you want to run simultaneously and check their wattage ratings:
| Device | Average Wattage | Estimated Daily Use |
|---|---|---|
| LED Strip Lights / Bulbs | 10W - 20W | 2 - 4 hours |
| Phone / Tablet Charger | 15W - 30W | 1 - 2 hours |
| Power Tool Battery Charger | 60W - 150W | 1 hour |
| Portable Radio / Speaker | 15W - 30W | 3 hours |
| Low-Wattage Personal Heater | 200W - 500W | 1 - 2 hours |
If your total daily consumption adds up to roughly 500Wh to 1000Wh (Watt-hours), a mid-sized portable power station (such as units offering 1000Wh of capacity) paired with a 200W to 400W solar panel array will suit your needs perfectly.
2. Selecting the Power Station
Look for expandable power stations from reputable brands (like EcoFlow, Bluetti, Anker, or Jackery). Key features to look for include:
- LiFePO4 Battery Chemistry: Ensure the unit uses Lithium Iron Phosphate cells. They last for thousands of cycles, are exceptionally safe, and handle temperature fluctuations much better than older chemistry types.
- Multiple Output Ports: Make sure it has standard AC wall outlets, USB-C ports with power delivery, and 12V DC car-style sockets.
- Pass-Through Charging: This allows the solar panels to charge the battery while the battery simultaneously powers your devices.
3. Selecting Solar Panels
You have two main choices for mounting solar panels on a shed:
- Rigid Roof-Mounted Panels: These are bolted directly onto your shed roof using Z-brackets. They look sleek, stay out of the way, and capture sunlight throughout the day automatically. However, they require drilling holes in your roof (which must be properly sealed) and cannot be easily adjusted for angle.
- Portable Folding Panels: These come with kickstands, allowing you to set them up on the ground or lean them against a fence where sunlight is strongest, then pack them away when not in use. They are brilliant for renters or those who prefer a zero-drill installation.
Step-by-Step Installation Guide
Ready to get your hands dirty? Follow this step-by-step installation guide to set up your off-grid shed solar system over a pleasant autumn weekend.
Step 1: Prep and Clean the Shed Interior
Before bringing in any tech, clear out the clutter. Sweep the floors, check for any roof leaks or drafty gaps, and organize your layout. Designate a safe, dry shelf or corner where your power station will sit securely out of harm's way.
Step 2: Position and Mount Your Solar Panels
If you are using roof-mounted rigid panels:
- Find a south-facing roof slope (if you are in the Northern Hemisphere) to maximize autumn sunlight capture.
- Tilt the panels roughly equal to your local latitude plus 15 degrees to optimize for the lower autumn sun angle.
- Attach mounting brackets securely to the rafters, ensuring all screw entry points are heavily sealed with waterproof silicone sealant.
If you are using portable panels, simply find the sunniest spot outside your shed, angle them toward the midday sun, and run an extension cable inside.
Step 3: Route the Solar Cables Inside
You need to get the solar cable from the outside panels into your indoor power station safely without letting in drafts, mice, or rain.
- Drill a small hole through the wall or roof overhang just large enough to fit your connector cables.
- Pass the cables through and use a weather-resistant cable entry gland or expanding foam to seal the hole completely.
- Connect the outdoor solar cables directly to the DC input port on your power station.
Step 4: Install Lighting and Accessories
Wiring up lights in an off-grid shed is surprisingly easy:
- Go 12V or LED: Whenever possible, use 12V DC LED strip lights or USB-powered lamps. They draw a fraction of the power that traditional incandescent bulbs require, maximizing your battery life.
- Mount Fixtures: Secure your lights along the central ceiling beam of the shed for even illumination. Run wiring neatly along corners using cable clips or wire raceways.
Keeping Warm: Tackling Heating in the Autumn Shed
One of the biggest challenges of using a shed in late autumn and winter is temperature control. Standard household space heaters pull 1,500 watts or more. Running a 1,500W heater on an average off-grid solar setup will drain a standard portable power station in less than 45 minutes.
To stay warm sustainably, use these clever heating tricks instead:
- Invest in Insulation: No amount of heating will help if your shed is drafty. Spend an afternoon insulating your shed walls with rigid foam board insulation and covering them with plywood or drywall. Seal windows and doors with weatherstripping.
- Use Low-Wattage Targeted Heating: Instead of heating the entire room, opt for low-wattage radiant heaters, heated seat cushions, or 12V electric blankets designed for camping. These often run on just 50W to 150W and keep you wonderfully warm directly.
- Thermal Mass: Let sunlight warm up black-painted water barrels or stone pavers inside the shed during the day, which will slowly radiate gentle heat into the room as evening temperatures drop.
Safety Best Practices for DIY Solar
While low-voltage and portable power station systems are remarkably safe compared to wiring directly into high-voltage mains electricity, it is still crucial to follow basic safety guidelines:
- Keep it Dry: Electronics and moisture do not mix. Ensure your power station is kept well away from leaky roofs, watering cans, or damp concrete floors (elevate it on a wooden block or shelf).
- Check Your Load Limits: Never exceed the maximum AC output wattage of your power station. Plugging heavy-duty machinery like table saws or high-draw heaters into a small unit will trigger safety shutoffs or damage the inverter.
- Secure Wiring: Keep all cables tucked neatly away from foot traffic to prevent tripping hazards or accidental disconnections.
- Ventilation: While modern LiFePO4 batteries do not vent toxic gases like old lead-acid batteries, it is still best practice to ensure your shed has basic passive ventilation to prevent stuffiness and condensation build-up.
Maximizing Solar Efficiency During Shorter Autumn Days
As autumn transitions into winter, days grow shorter and overcast skies become more common. Here are top tips to ensure your shed solar station keeps pumping out maximum power:
- Keep Panels Clean: Autumn brings falling leaves, dust, and morning dew. Regularly wipe down your solar panels with a soft microfiber cloth and lukewarm water to ensure maximum light absorption.
- Adjust the Angle: Since the sun sits lower in the sky during autumn and winter, tilting your panels steeper (closer to vertical, depending on your latitude) captures more direct sunlight than flat summer layouts.
- Top Up Before Big Projects: If you know you are going to spend a long Saturday working in the shed with heavy power tools, consider bringing the portable power station inside your house the night before to top it up to 100% using standard household AC power.
Conclusion: Enjoy Your Newly Upgraded Autumn Sanctuary
Transforming your backyard shed with an off-grid solar power station is one of the most rewarding DIY projects you can tackle this autumn. It combines sustainability, technological independence, and practical craftsmanship into a single weekend upgrade.
No longer will your shed be a dark, cold space abandoned to the seasonal elements. With bright LED lighting, a cozy workspace, charged tools, and a reliable off-grid power supply, your shed becomes a true extension of your home—a private workshop, a hobby room, or a peaceful autumn sanctuary where you can create, tinker, and relax all year round.
Ready to get started? Grab your tools, check out your local hardware or tech supplier, and turn your backyard shed into an eco-friendly powerhouse today!



0 Comments